
Honey Vanilla Caramels – Buttery, Floral, and Melt-in-Your-Mouth
There’s something timeless about honey vanilla caramels. Soft, golden, and kissed with floral sweetness, they melt gently on the tongue and leave behind a buttery, elegant finish. Unlike traditional caramels, this version replaces part of the sugar with natural honey, creating a more complex flavor that feels nostalgic and luxurious all at once. Whether you’re making them for gifting, entertaining, or stocking your own candy jar, these caramels come together beautifully with just a few pantry staples. In this guide, I’ll walk you through how to make honey vanilla caramels from scratch — chewy, creamy, and foolproof every time.
The Sweet Story Behind This Recipe
A caramel with roots in my grandmother’s kitchen
I remember standing on a stool in my grandmother’s kitchen, watching her pour golden honey into a pot of bubbling sugar. “Honey makes everything better,” she’d say, stirring gently as the sweet aroma filled the air. She never used a recipe — just instinct and memory. Her honey vanilla caramels were soft, delicate, and unlike anything store-bought.
Years later, when I tried recreating them, I started with her same principle: good ingredients, simple steps, and a generous swirl of real vanilla. That first batch brought me right back — and now it’s one of my favorite candies to gift during the holidays, alongside salted almond toffee and vanilla bean fudge.
What makes honey vanilla caramels so special
Honey and vanilla aren’t just add-ins — they define the flavor of this caramel. The honey brings a soft floral note and natural sweetness that lingers, while the vanilla warms the base with its smooth, almost creamy aroma.
The real magic comes from using quality ingredients: pure honey (not flavored corn syrup), real butter, and vanilla extract or paste. The result? Caramels that are rich, soft, and just slightly chewy — not sticky or tough.
How to Make Honey Vanilla Caramels at Home
Key ingredients that define the flavor
Honey vanilla caramels are all about purity and balance. While traditional caramels rely solely on sugar and butter, this version leans into honey’s natural complexity to deliver a richer, more nuanced bite. Here’s what you’ll need:
- Heavy cream – for that classic caramel softness
- Unsalted butter – adds depth and creaminess
- Granulated sugar – stabilizes texture and helps with caramelization
- Pure honey – use light, floral varieties like clover or wildflower for best results
- Light corn syrup – prevents crystallization and keeps caramels smooth
- Pure vanilla extract – or vanilla bean paste for stronger aroma
- Fine sea salt – to balance the sweetness and enhance flavor
Choose a mild, high-quality honey to avoid overpowering the vanilla. Clover honey is a favorite here, but orange blossom or acacia also work beautifully.
Step-by-step instructions
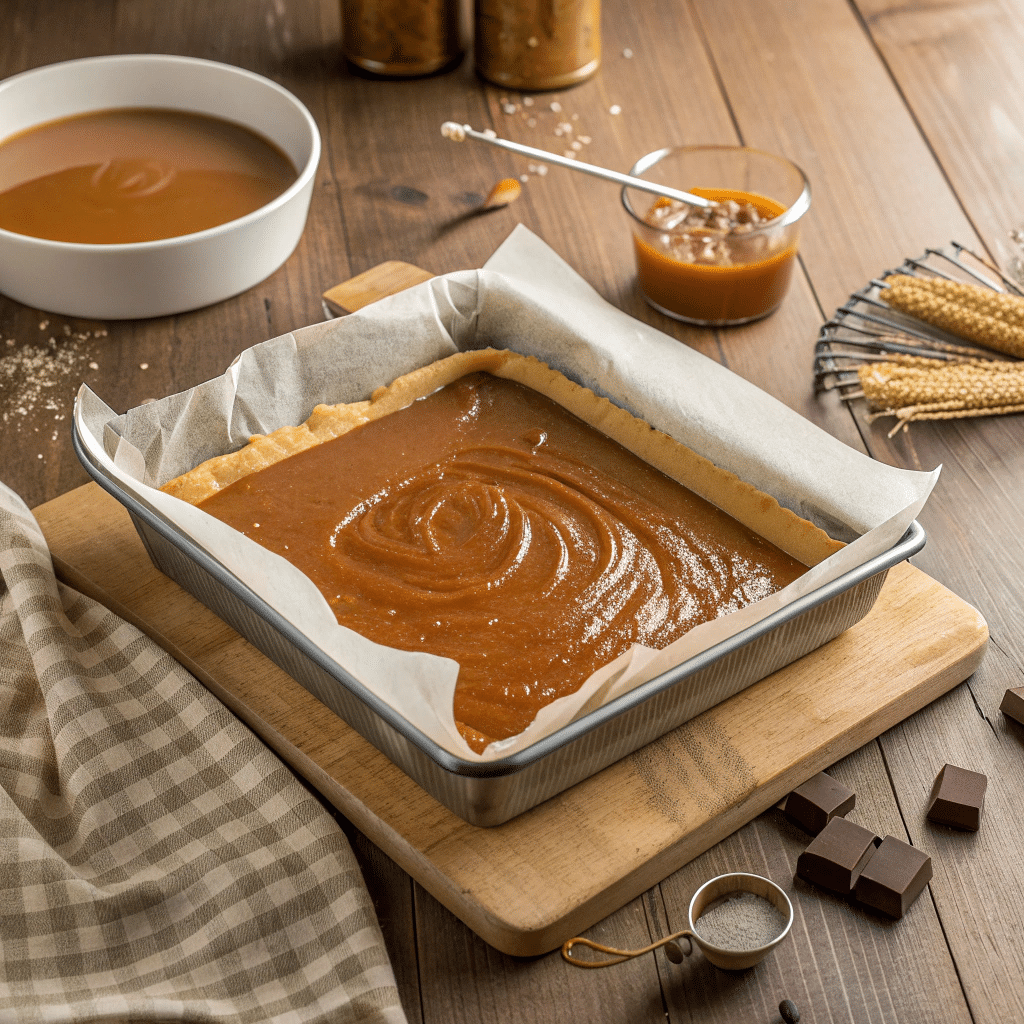
- Line your pan: Use parchment paper in an 8×8-inch dish and lightly grease the paper.
- Heat the base: In a heavy-bottomed saucepan, combine cream, butter, sugar, corn syrup, and honey. Cook over medium heat, stirring constantly until melted and smooth.
- Attach thermometer & boil: Clip on a candy thermometer. Once boiling, stop stirring and let it reach 245°F (firm ball stage).
- Add vanilla: Remove from heat and stir in vanilla and sea salt.
- Pour & set: Quickly pour the mixture into your prepared pan and let it sit undisturbed for 3–4 hours at room temperature.
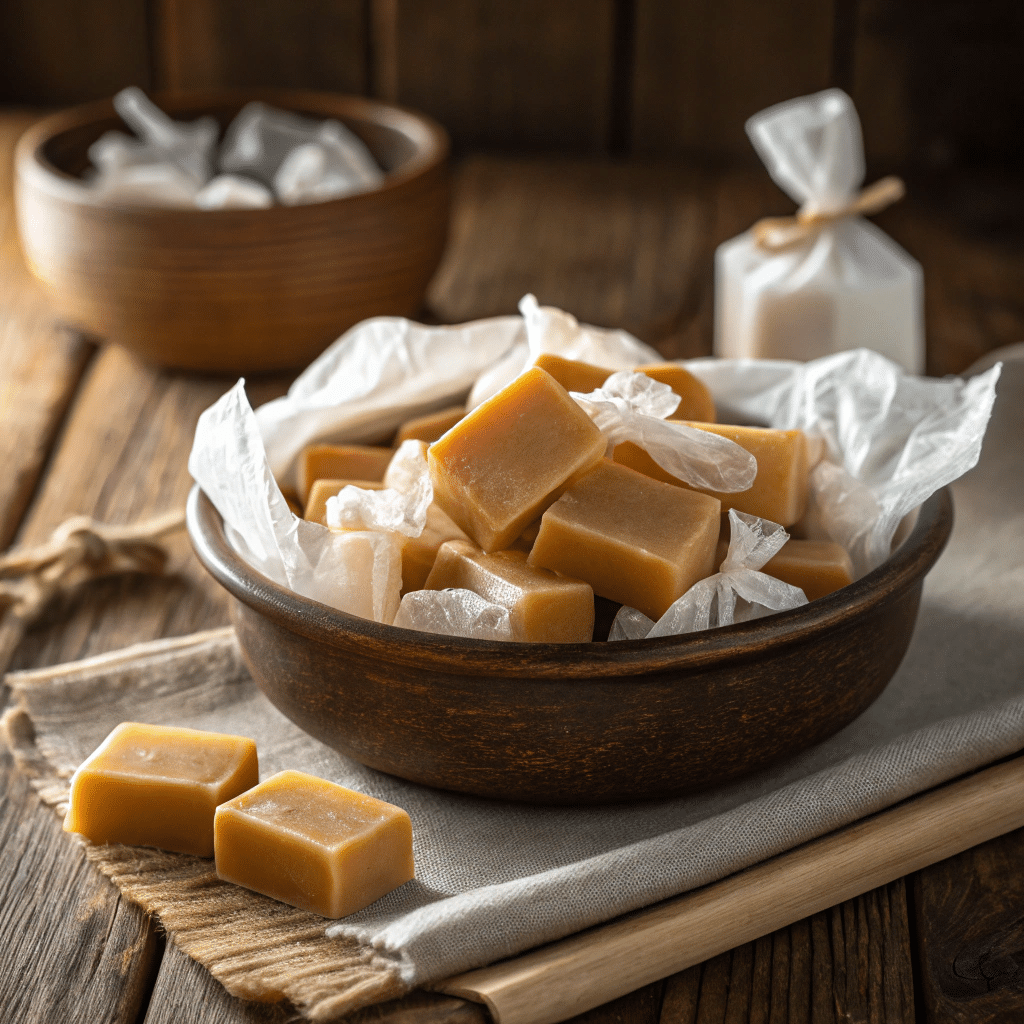
- Cut & wrap: Slice with a buttered knife and wrap each caramel in wax paper to store.

Honey Vanilla Caramels – Buttery, Floral, and Melt-in-Your-Mouth
Ingredients
Method
- Line an 8×8-inch pan with parchment and lightly grease it.
- In a heavy saucepan, combine cream, butter, sugar, corn syrup, and honey.
- Heat over medium, stirring constantly, until smooth and melted.
- Attach a candy thermometer and boil without stirring until it reaches 245°F.
- Remove from heat and stir in vanilla and sea salt.
- Pour into the prepared pan and let cool for 3–4 hours.
- Cut into squares and wrap in wax paper to store.
Notes
For salted caramels, sprinkle flaky sea salt on top immediately after pouring into the pan.
Avoid raw honey unless well blended, as it may cause separation during cooking.
Flavor Variations & Texture Perfection
Creative variations worth trying
Once you’ve mastered the base recipe, honey vanilla caramels become a delicious canvas for flavor exploration. Here are a few standout twists that preserve the core comfort of the original while introducing something new:
- Salted Honey Vanilla Caramels: After pouring into the pan, sprinkle the top with flaky sea salt. This simple addition elevates the sweet–salty contrast and enhances both the honey and vanilla.
- Herbal Honey Caramels: Infuse your cream with a sprig of rosemary or thyme before cooking. The subtle herb flavor pairs beautifully with the floral sweetness of honey.
- Citrus Honey Caramels: Add 1 teaspoon of orange or lemon zest during the final stir for a bright, aromatic finish.
- Spiced Honey Caramels: Mix in a pinch of cinnamon, cardamom, or even chai spice blend to warm things up — ideal for fall or winter.
How to get that perfect soft chew
Caramel texture can make or break your batch. Here’s how to ensure your honey vanilla caramels turn out just the way you want — smooth, soft, and perfectly chewy:
- Use a thermometer: Don’t guess! The key temperature is 245°F. A few degrees higher will make them firm and harder to cut; lower and they may not set well.
- Don’t over-stir: After the mixture begins boiling, stop stirring. Constant movement can encourage crystallization and affect smoothness.
- Cool slowly: Let the caramels cool naturally at room temperature. Refrigerating too early can cause separation or greasy patches.
- Choose the right honey: Avoid raw honey unless fully emulsified, as it can separate or darken too much when cooked.
These caramels are incredibly forgiving with a little practice — and every batch gets easier once you know how your ingredients behave. Up next: how to store, wrap, gift, and answer the most common caramel-making questions.
Storage, Gifting & FAQs
How to store and share your caramels
Once your honey vanilla caramels are cut and wrapped, you’ll want to keep them fresh and beautifully presented — especially if you’re gifting them.
- Storage: Keep wrapped caramels in an airtight container at room temperature. They stay soft and chewy for up to 2 weeks. For longer storage, refrigerate for up to 1 month — just bring them to room temperature before serving.
- Freezing: Caramels freeze well! Wrap them individually, then place in a zip-top bag. Freeze for up to 3 months. Defrost at room temperature before unwrapping.
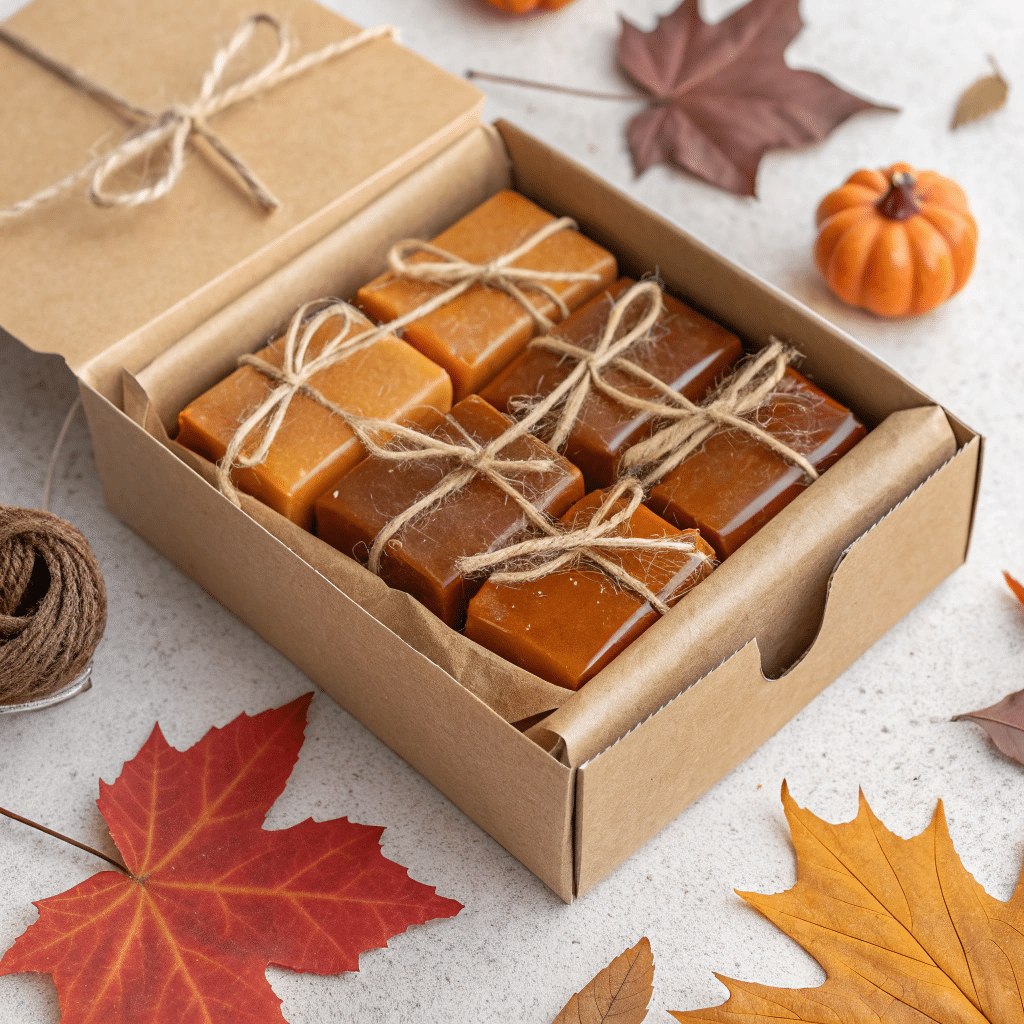
- Gifting: Wrap each piece in wax paper or parchment and tie with twine for a rustic look. Small kraft boxes or mason jars filled with caramels pair beautifully with a handwritten label and ribbon.
FAQ Section
What makes honey caramels different from regular caramels?
Honey caramels have a deeper, more floral sweetness and softer texture than standard caramels. The honey adds complexity and moisture that cane sugar alone doesn’t provide.
Can I use raw honey in caramels?
You can, but raw honey may separate or darken more quickly during cooking. It’s best to use a filtered, mild-flavored honey for consistent results.
How do I keep honey caramels soft and chewy?
Cook to exactly 245°F and allow them to cool slowly at room temperature. Wrap them individually once set to maintain freshness and moisture.
What type of vanilla works best in honey caramels?
Pure vanilla extract is perfect, but vanilla bean paste will give you a more intense flavor and visible specks. Avoid imitation vanilla for best results.
Conclusion
Honey vanilla caramels are the kind of treat that bridges generations — nostalgic enough to bring back memories, yet elegant enough to serve at a modern table. Whether you’re gifting them, sharing at a gathering, or just sneaking one as a quiet afternoon treat, they offer that perfect blend of comfort and indulgence. I hope this recipe brings warmth to your kitchen like it has to mine.


