
Mini Chocolate Caramel Cups – Rich, Gooey, and Bite-Sized Perfection
If you love the combination of chocolate and caramel, then these mini chocolate caramel cups are about to become your go-to treat. Rich, gooey caramel is nestled inside a silky chocolate shell — all in a perfectly poppable size. They’re easy to make, look gorgeous on dessert trays, and make a big impression at parties or as edible gifts. In this recipe, I’ll walk you through the simple steps to create these indulgent little bites from scratch. Plus, I’ll share tips on how to keep the caramel soft, how to temper your chocolate, and tasty flavor variations to try.
Why These Little Cups Steal the Show
A treat inspired by childhood candy obsessions
Growing up, I was obsessed with those chocolate-covered caramels you’d find in fancy candy boxes — the kind you’d save for last. I used to bite around the edges, letting the caramel slowly melt in the center. As I got older, I wanted to recreate that nostalgic indulgence — but in a more practical, make-ahead format.
That’s when I landed on these mini chocolate caramel cups. Made in mini muffin liners, they give you that rich, chewy caramel and snap of chocolate — but they’re homemade, customizable, and better than store-bought. Every holiday season now, they sit right next to our peanut butter truffles and salted caramel turtles, wrapped up in little tins or boxes.
When friends ask for “those little chocolate things,” this is what they mean.
Why mini caramel cups are perfect for parties
Beyond the pure deliciousness, there’s something about mini chocolate caramel cups that feels fun and fancy — but not fussy. They’re small enough to be served as part of a dessert spread, stacked in jars, or tucked into holiday boxes. The chocolate can be dark, milk, or even white — and the caramel? Always buttery, soft, and rich.
How to Make Mini Chocolate Caramel Cups at Home
Simple ingredients, gourmet result
What makes these mini chocolate caramel cups so impressive is how easy they are to make with just a few everyday ingredients. The secret is layering — chocolate, then caramel, then chocolate again — to seal in that soft center and get that perfect bite every time.
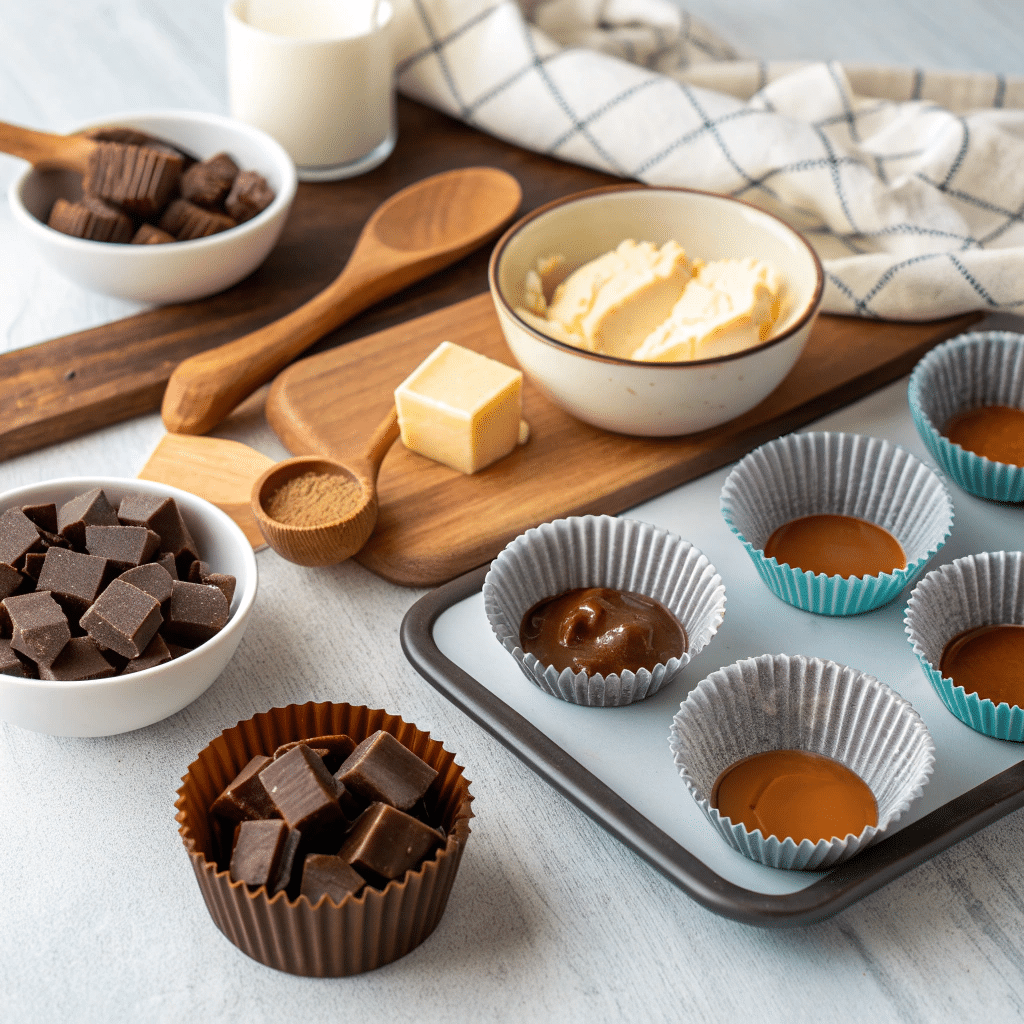
Here’s what you’ll need:
- Good-quality chocolate (dark, semi-sweet, milk, or a mix)
- Soft caramel (homemade or high-quality store-bought)
- Heavy cream (if making your own caramel)
- Unsalted butter (adds smoothness to the caramel)
- Fine sea salt (optional, for contrast)
- Mini paper liners and a mini muffin tin
For the best flavor and texture, temper the chocolate or use compound chocolate that doesn’t require tempering.
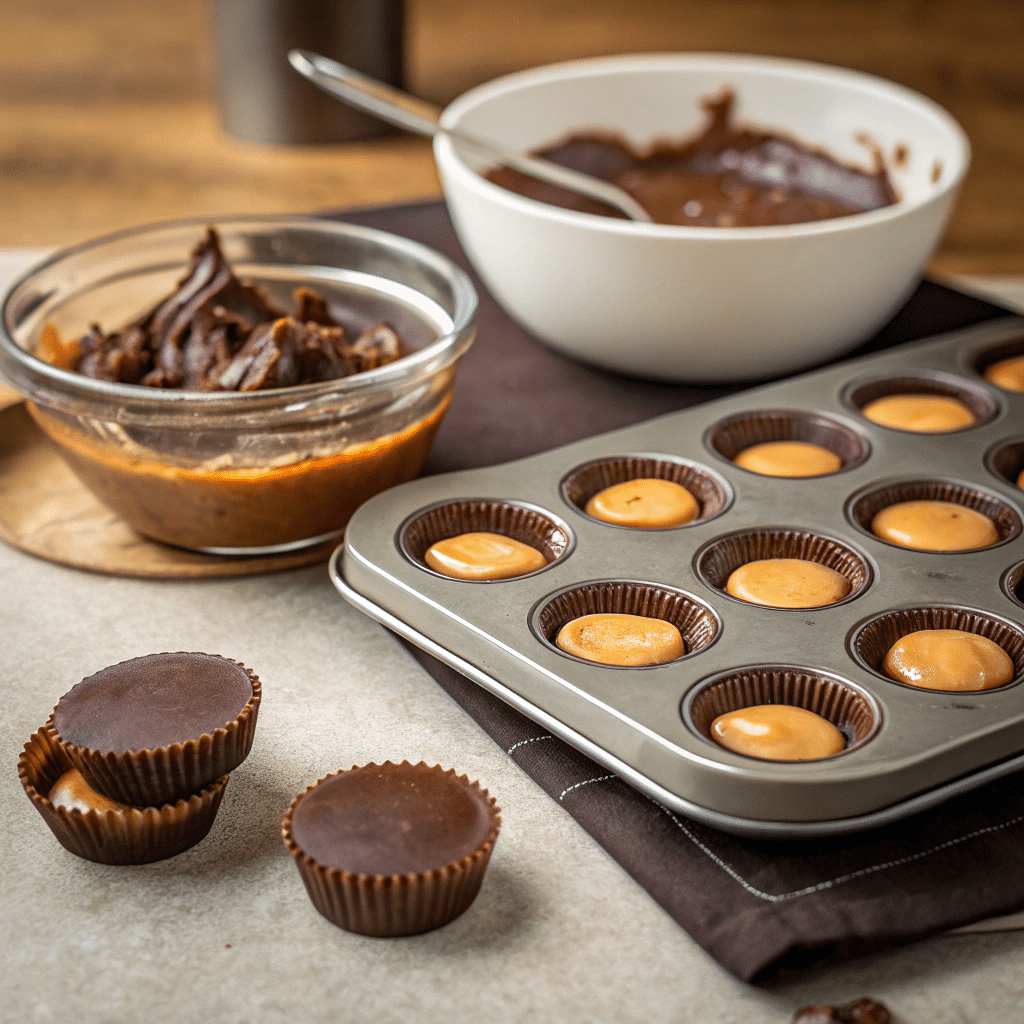
Step-by-step instructions
- Prepare your liners: Line a mini muffin tin with mini cupcake liners.
- Melt the chocolate: Gently melt the chocolate in a double boiler or microwave in 30-second bursts.
- Add base layer: Spoon about 1 teaspoon of melted chocolate into each liner. Tilt the pan or use a brush to coat the sides slightly. Freeze for 5 minutes.
- Add the caramel: Spoon about 1/2 teaspoon of soft caramel onto the set chocolate base. Keep it centered and avoid touching the sides.
- Top with more chocolate: Cover the caramel with more melted chocolate and smooth the tops. Tap the pan gently to remove air bubbles.
- Chill until set: Refrigerate for 15–20 minutes, then bring to room temperature before serving.
Mini Chocolate Caramel Cups – Rich, Gooey, and Bite-Sized Perfection
Ingredients
Method
- Line a mini muffin tin with paper liners.
- Melt the chocolate gently in a double boiler or microwave in 30-second bursts.
- Spoon 1 teaspoon of chocolate into each liner and gently coat the bottom and sides.
- Place the tray in the freezer for 5 minutes to set the base.
- Add 1/2 teaspoon of soft caramel into the center of each cup.
- Top with more melted chocolate to fully cover the caramel.
- Tap the tray gently to remove air bubbles and smooth the tops.
- Refrigerate until fully set (about 15–20 minutes).
- Serve at room temperature for the best texture.
Flavor Variations & Expert Texture Tips
Twist the flavor, keep the wow
One of the joys of mini chocolate caramel cups is how easy they are to personalize. With just a few tweaks, you can create flavor profiles that suit the season or your own cravings.
Here are some delicious variations to try:
- Sea Salt Caramel Cups: Sprinkle flaky sea salt on top right after pouring the final chocolate layer. The contrast between salty and sweet is unbeatable.
- Espresso Caramel Cups: Stir ½ teaspoon of instant espresso powder into the melted chocolate or the caramel to add a bold, coffee kick.
- Nutty Caramel Cups: Add a roasted pecan or almond on top of the caramel layer before sealing with chocolate. This adds a satisfying crunch.
- Spiced Caramel Cups: Mix a pinch of cinnamon, cayenne, or even chai spice into the caramel for warmth and depth.
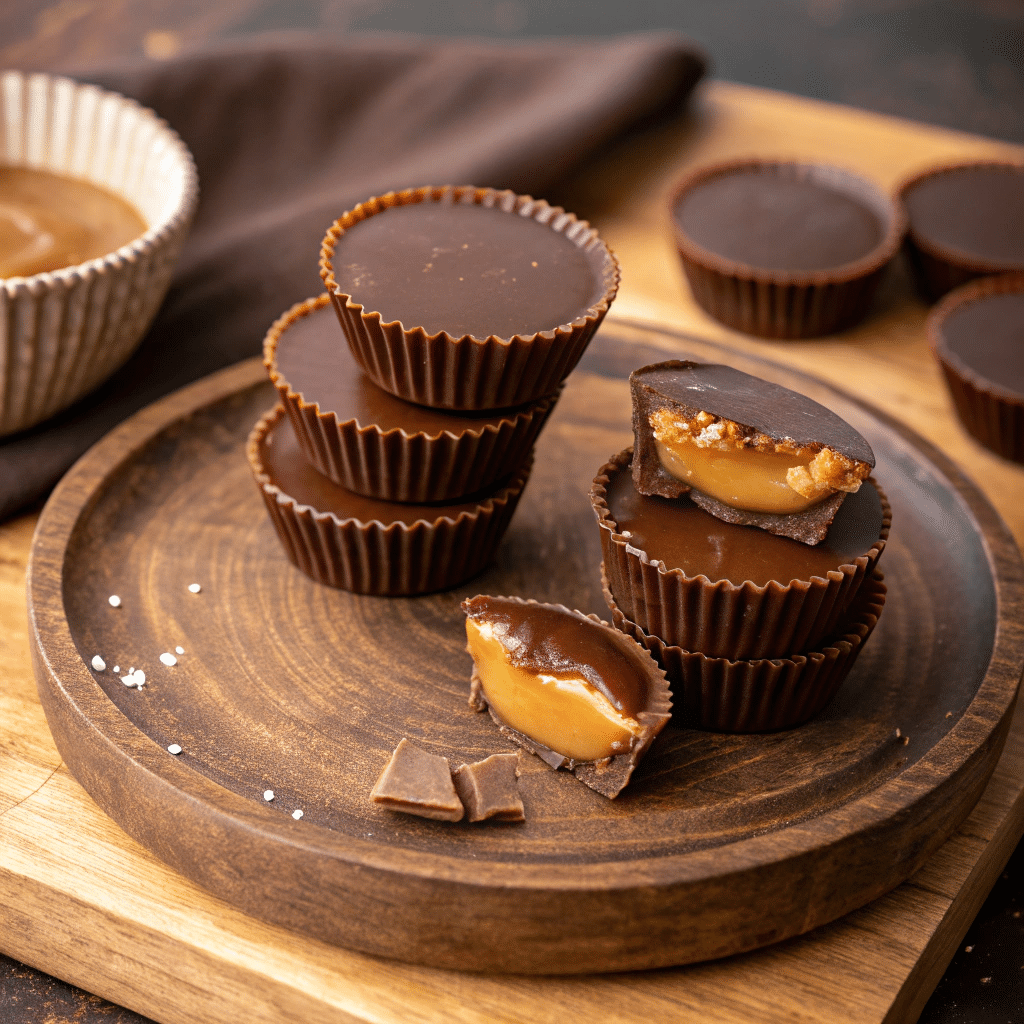
How to get that perfect bite every time
Texture makes all the difference with these candy cups — especially when you want that perfect snap followed by a creamy, gooey center.
Here’s how to ensure you get it right every time:
- Use soft caramel: Whether homemade or store-bought, the caramel should be spoonable, not runny or hard. Refrigerate it slightly if needed to keep it manageable.
- Cool between layers: Let the bottom chocolate layer chill before adding caramel, and repeat before sealing the top. This keeps the layers defined and neat.
- Tap out air bubbles: After adding the top layer of chocolate, gently tap the muffin pan on the counter to release bubbles — this gives a smoother finish.
- Use a piping bag: For precise layering, use a piping bag or zip-top bag with the tip cut off to place both caramel and chocolate neatly.
Get creative and confident — these mini cups are as fun to make as they are to eat.
Storage, FAQs & Final Thoughts
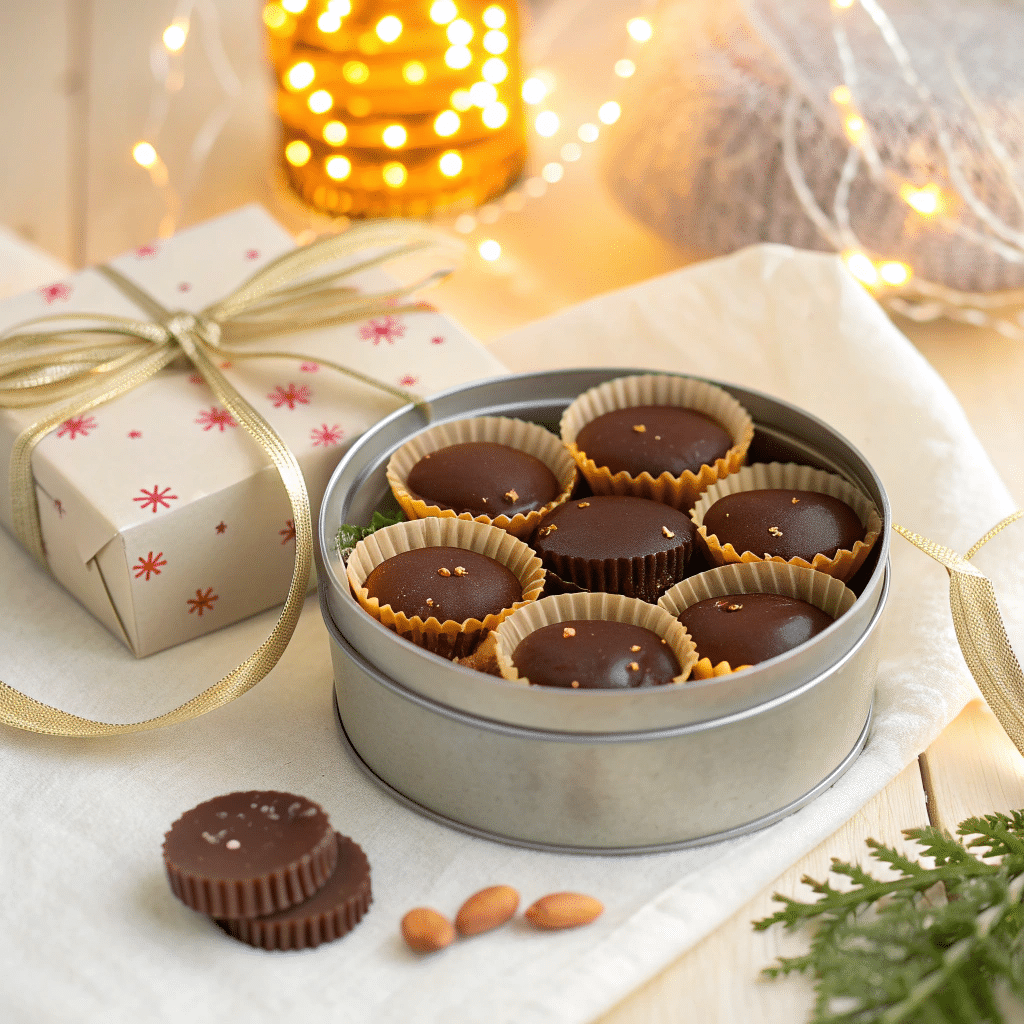
How to store, serve, and gift your caramel cups
Once your mini chocolate caramel cups are cooled and set, they’re easy to store and make fantastic edible gifts. Here’s how to keep them fresh and beautiful:
- Room Temperature: Store in an airtight container for up to 1 week. Keep in a cool place away from direct sunlight.
- Refrigerator: You can refrigerate them for 2–3 weeks. Let them sit at room temp for 15 minutes before serving so the caramel softens.
- Freezer: Freeze in layers between parchment for up to 2 months. Thaw overnight in the fridge before serving.
To gift them, line a small tin or box with parchment and tuck in a dozen wrapped cups.
FAQ Section
How do you make chocolate caramel cups at home?
Melt chocolate, pour a base layer into mini liners, chill, add soft caramel, top with more chocolate, and chill again. That’s it!
What kind of chocolate is best for caramel cups?
Use high-quality chocolate bars or melting wafers. Semi-sweet or dark chocolate is best for balance, but milk or white work too.
Can I add sea salt or toppings to mini caramel cups?
Yes! Flaky sea salt, chopped nuts, or even sprinkles can be added right after pouring the top chocolate layer for extra texture and flavor.
How do I keep the caramel soft inside the chocolate?
Use soft, pourable caramel (not hard candy caramel). Avoid overcooking it, and store cups at room temperature to maintain softness.
Conclusion
Mini chocolate caramel cups are proof that good things come in small packages. Rich, gooey, and stunningly simple to make, they’re ideal for gifting, sharing, or savoring with coffee on a quiet afternoon. Whether you prefer them plain, salted, or spiced, they deliver that classic chocolate–caramel combo in the most delightful way.
Try a batch this weekend — and don’t be surprised if they disappear by Monday.


